Your clients want on demand fitness, so let’s make it easy for them to find the right program for them!
Before we get started with this, have you built your first program yet? Check out this article for how to build out a multi-day program.
Okay, you ready? Let’s get into creating filters for multi-day programs.
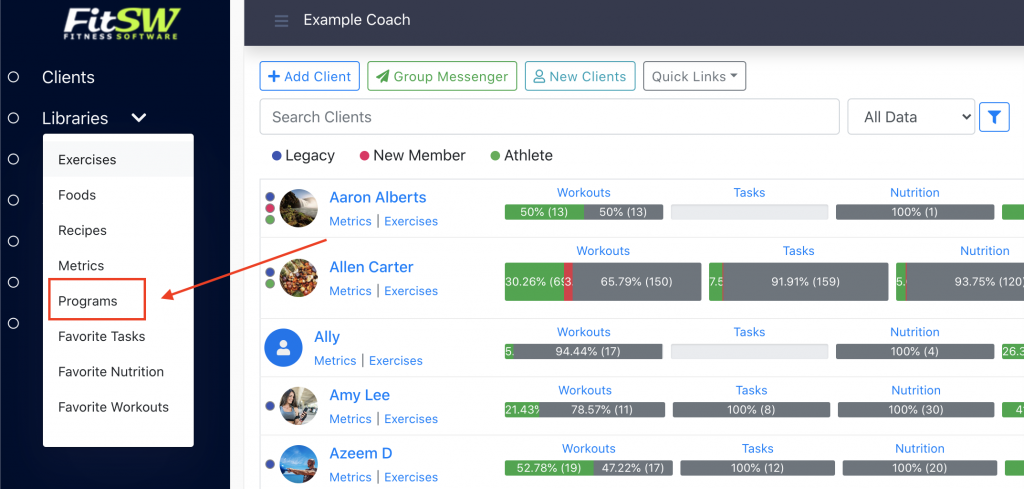
Navigate to the programs page from the client dashboard by clicking the Programs option from the Libraries menu.

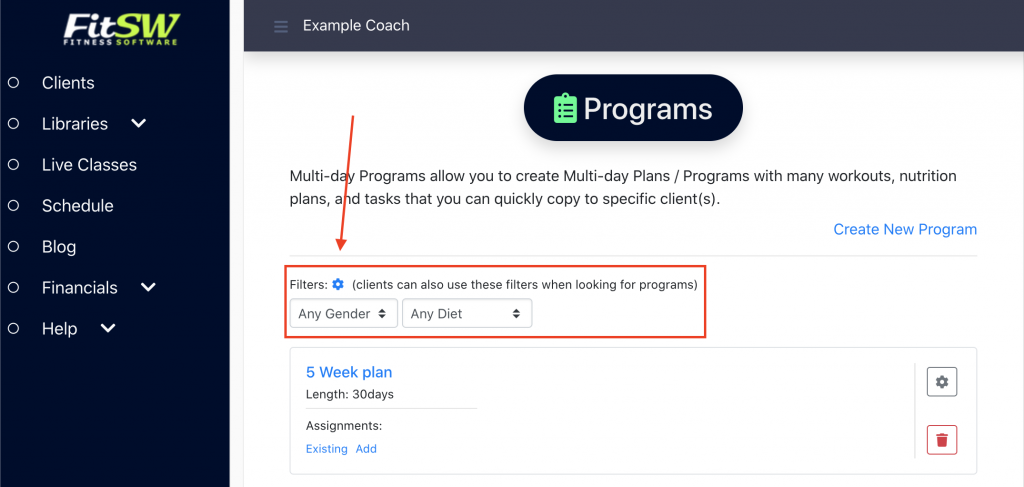
Once on the page, find the filters section in the middle of the screen. Click on the blue gear button to open up the filters customization page.

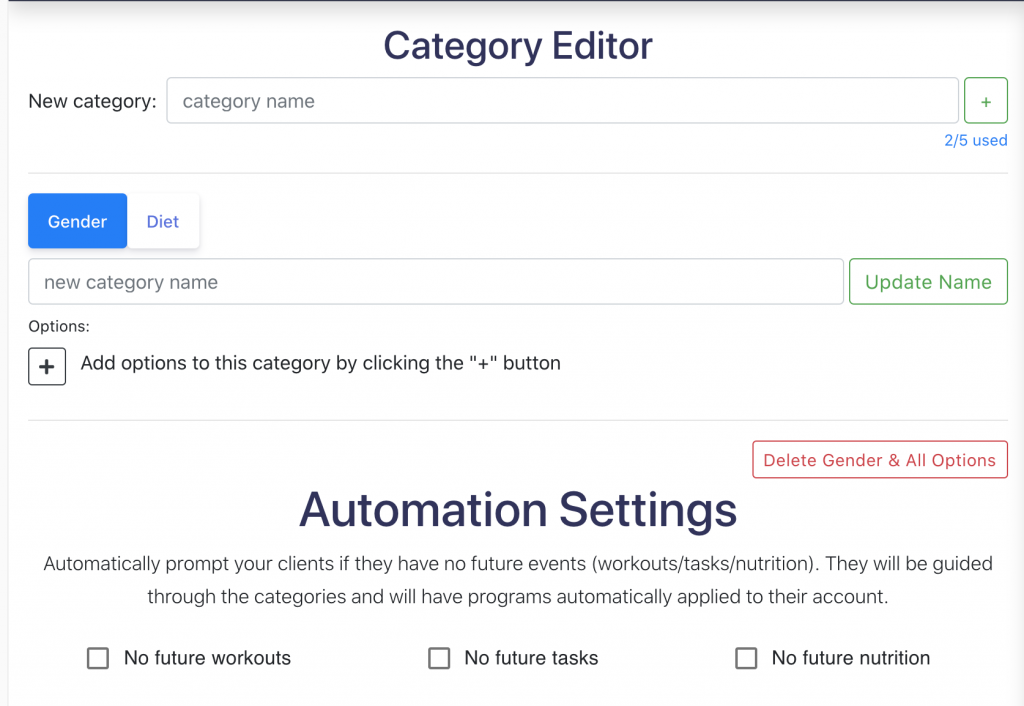
You can have up to 5 custom categories that your clients can filter by. The ones we have set here are by gender and diet, but those are just examples.
The only thing you have to do is input a category name. That category will then appear as labels in the second section where it currently says Gender and Diet in the picture below.

Add options for the category by just clicking the black plus in the center of the screen and then inputting the names for the options.
You can also automate these options for clients who are viewing programs for the first time and have no upcoming events.
Note: These filters for multi-day programs only apply if you allow your clients to enroll in the programs. Otherwise, you will have to assign it to them!
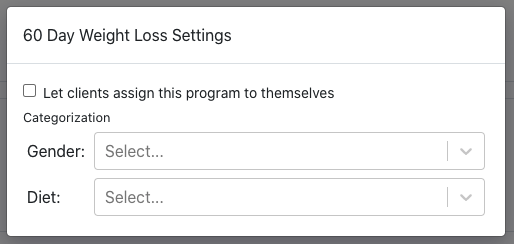
To choose whether clients can enroll in programs, click on the grey gear icon on the program from the list.

A modal will appear where you can check off wether you want clients to have access to enrolling in this program and what screening option questions you want to apply to this program. If they choose one of the options you list here, then this program will appear to them under the applied conditions.

